Sharing best practices
Gain insight into strategies for successful collaboration and learn how to successfully share passwords across a team.

Written by Owen Parry
Updated at September 20th, 2023
Table of Contents
Use sharing - it is a great way for your team to collaborate
Sharing is one of the most powerful features in Password Boss and it gives you a secure way to collaborate with your team.
Overview
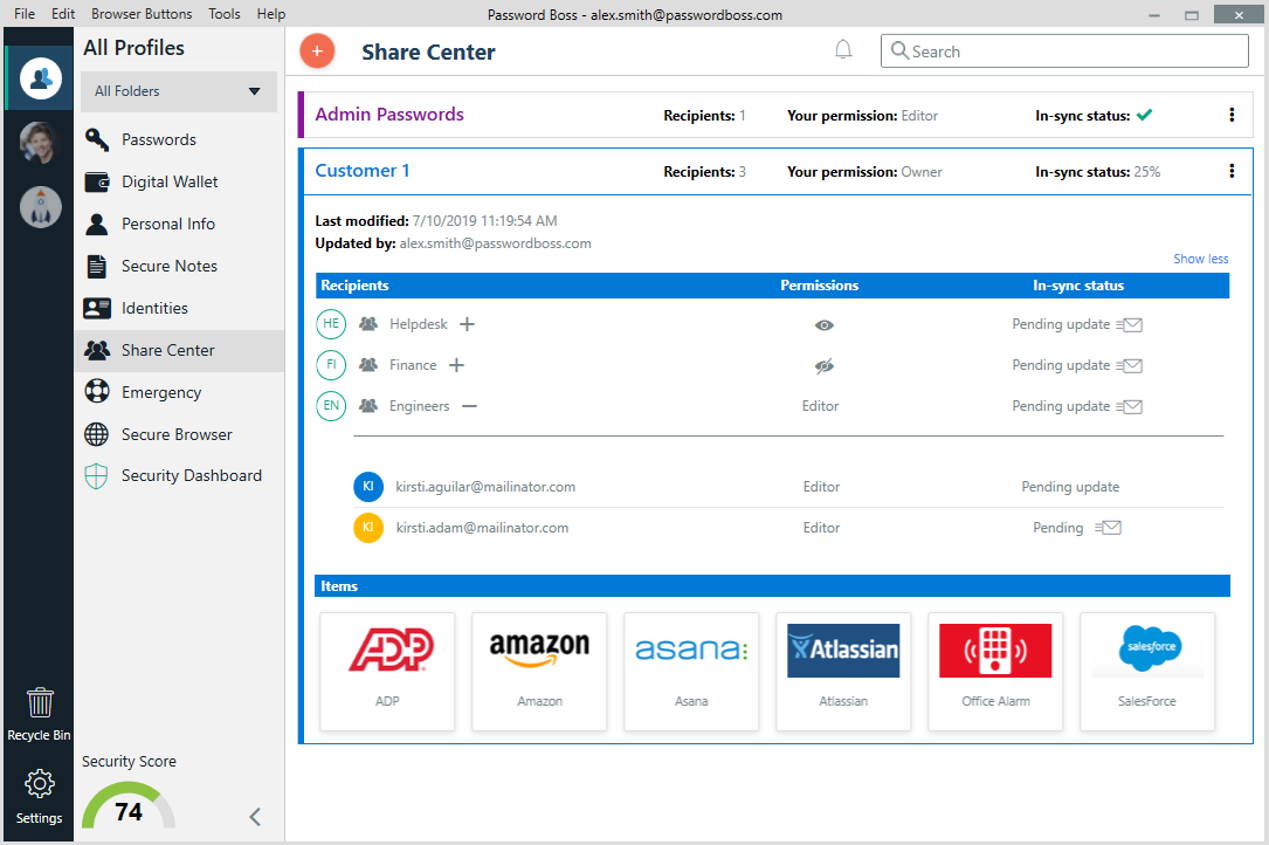
Sharing items in Password Boss
It’s easy to share any item in Password Boss with anyone else. You can securely share one item, several items, or an entire folder of items. When you share items using Password Boss, you can choose recipients from the list of users in your company or from the list of groups that your admin has created.
Any item can be shared
- Passwords, Digital wallets, notes, etc.
Only item owners can share items
- You retain ownership of the items shared, and shared items cannot be re-shared
Two types of shares
- Item shares
- Folder shares
Shares can be sent to anyone or restricted with security policies
If the recipient does not have a Password Boss account, we will help them make an account, and you can control if you allow your clients to create shares
- Standard Security Policy - Disable Sharing
- Advanced Security Policy - Restrict Sharing to specific recipients
Important notes on sharing
-
Shared items are encrypted, meaning that only you and the recipient have access to the shared data.
-
You retain ownership of items you share. This means that the recipient cannot re-share the item with someone else.
-
You can cancel a share at any time. Canceling a share will automatically remove any shared items from the recipient's account the next time their account synchronizes.
-
Items are shared until you cancel them. You can also add an expiration date if you like.
- Shares can contain individual items or folders.
-
Once you share something, you can edit the share to add, change, or remove items from the share.
- When you make changes to shared items, the changes are sent to the recipients of the shared items.
- Items that have been shared with you will appear in the share center, in the Shared Folders list of folders, and in the corresponding section along with your personal items.
Use groups to share items
An administrator for your team can create groups of users for your team on the portal—for, example Marketing, Finance, HR, etc. When users are added or removed from your team, have the admin update the group membership on the portal.
When you create shares, choose groups instead of individuals as recipients. When groups are used you will not need to edit the share when your team membership changes. As long as the user's team members are added to the groups on the portal, they will automatically receive the shared data when they log in to their Password Boss account
Use groups to manage users
Why you should use groups
Groups are designed to make it easy to manage recipients of shared items. The benefits of using groups include:
- Shares sent to groups are automatically updated as the membership changes. If shares are sent to individuals, each must be manually edited as the recipient list changes.
- It is quicker to manually choose groups as recipients then add each recipient individually.
- If you need to review a share and who has permission to share, you do not need to scroll through long lists of recipients.
The Everyone group
All teams have an Everyone group that is automatically created for your team. The Everyone group contains all team members from your account. The membership of the Everyone group is maintained automatically by Password Boss.
The Everyone group includes everyone in your account. Only share to the Everyone group as a recipient when all team members need access to the shared items. If only some team members need access to the shared items, create a new group with limited membership.
Use meaningful names for groups
- Use names for your groups that describe the group so that other team members can identify the group. Group names that identify the group, project, or department make it easy for other team members to know what the group is for. Examples: Marketing, Finance, Project Alpha.
- Consider adding the permissions to the name of the group.
- Depending on your team structure, it may be useful to create groups that will be used to assign read-only permission and other groups with editor permissions. Examples: Marketing-Read Only, Marketing-Editor, Sales-Read Only, Sales-Editor, Admin-Read Only, Admin-Editor.
Avoid duplicating groups
Keep your list of groups concise and avoid making groups that duplicate the membership in an existing group.
How to create groups
- Login to the Password Boss portal as an admin for your team.
-
Click Users & Groups from the left menu.
- Scroll down to the Groups section.
- Click +Create New Group.
-
Enter a group name and click save.
How to add or remove users from a group
- Login to the Password Boss portal as an admin for your team.
-
Click Users & Groups from the left menu.
- Scroll down to the Groups section.
-
Find the group you want to change.
- From the blue Actions button
 Choose Edit.
-
Add or remove users from the group. You can also edit the name of the group from this screen.
-
Click Save when you are done.
How to delete groups
- Login to the Password Boss portal as an admin for your team.
-
Click Users & Groups from the left menu.
- Scroll down to the Groups section.
-
Find the group you want to change.
- From the blue Actions button Choose Delete.
- On the confirmation screen, click Delete group.
Understand Roles and Permissions
When you create a share, you can use permissions to control the level of visibility to password items in the share.
Roles and permissions for recipients of shared items
Recipients of shared items, which can be either folder(s) or individual items, can have three possible permissions. This article explains the each of the permissions.
Editor
- Can change the contents of a shared item. For example updating a password on a shared item.
- Can view all fields on all shared items
Read only - password visible
- Can view all fields on all shared items
Read only - password not visible
- Can view all fields on all shared items except for password fields
Important note on "Read only password not visible"
"Read only - password not visible" does not block the recipient from accessing the password. This permissions blocks the recipient from accessing the password in the Password Boss application. Once the password is entered into a website Password Boss can no longer prevent a user from retrieving the password directly from the webpage.